
Special Bands
All reports must at least contain a Detail band. But reports may also contain special bands, like Header, Footer, Title, and Summary.
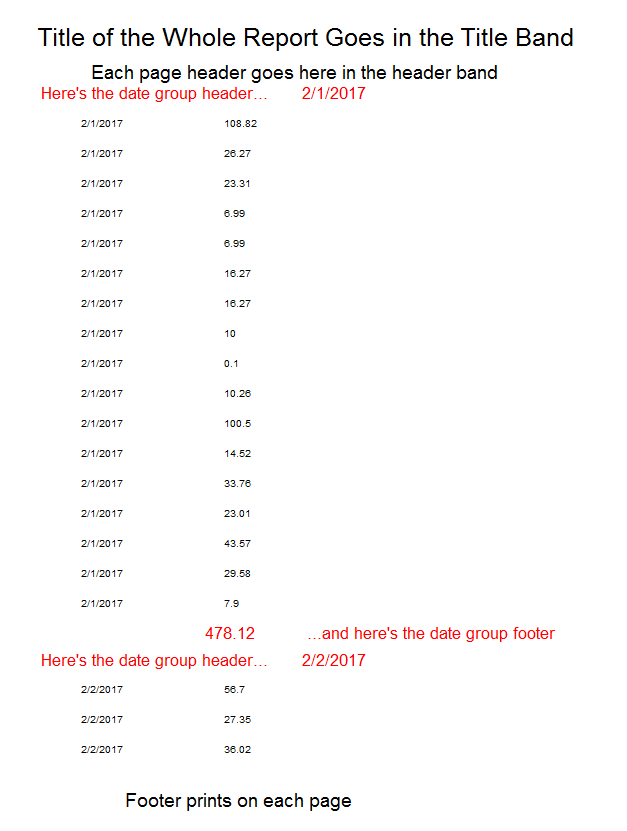
Here’s an example of a report that has 11 different bands, 5 of which are “collapsed” and show no whitespace or data:
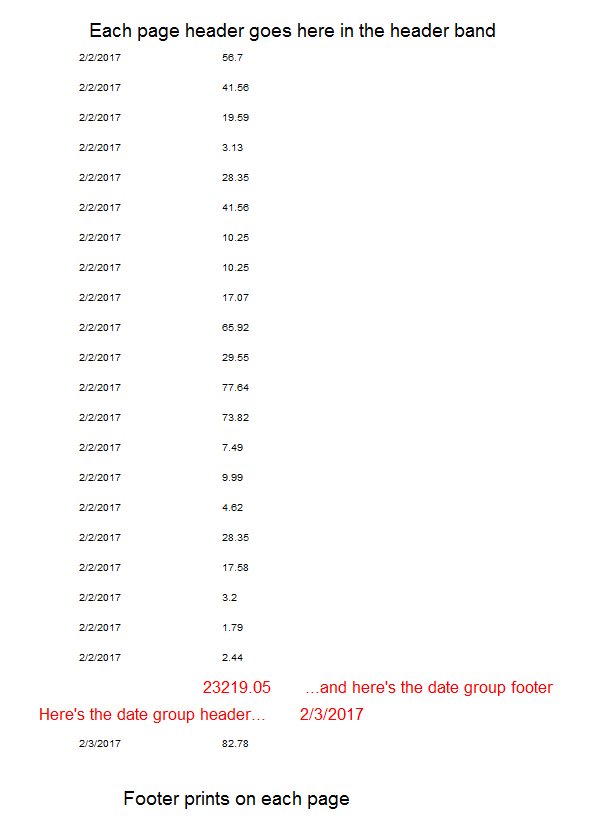
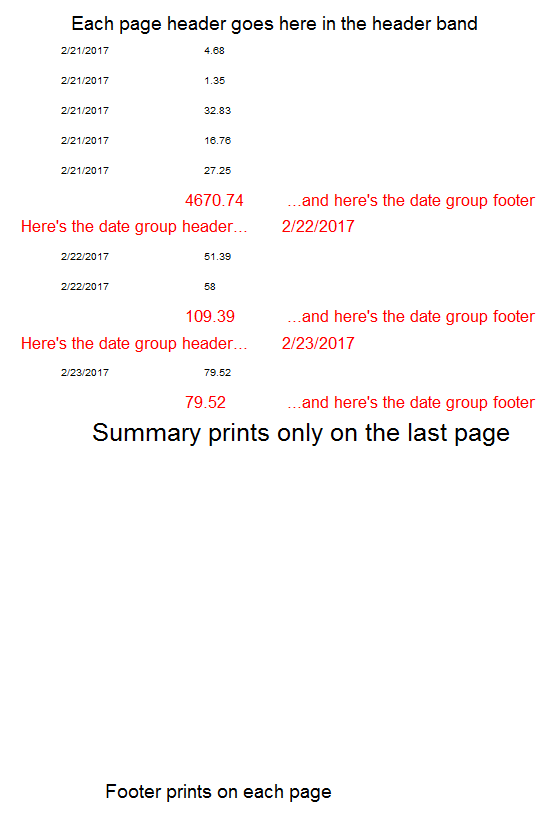
By default, what’s in the Header and Footer band prints at the top and bottom of every page, including the first and last. The Title prints at the very top of the first page (above the header) and the Summary prints at the bottom of the last page – above the last page’s footer.
|
First Page |
Middle Pages |
Last Page |
 |
 |
 |
You can toggle whether the Header and Footer print on the first and/or last pages by right-clicking on either the Header or Footer band (in the white space) and checking or unchecking PrintOnFirstPage or PrintOnLastPage.
You can show or hide/collapse the Header, Footer, Title, and Summary bands altogether by selecting Report from the menu bar and checking/unchecking the appropriate component.
Grouping
Grouping allows you to view data in organized ways that “make sense,” and also allows you to perform simple calculations (totals, averages, etc.) on the groups. Sometimes the same data should be grouped differently, depending on your purpose.
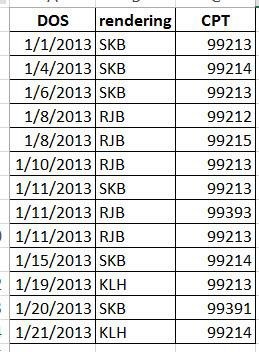
Let’s say we want to prepare a productivity report for January 2013. Here is the raw data we have obtained from ARCHIVE_TRANSACTIONS, using the fields DATE1, STAFFINIT, and CPTCODE for the date of service, rendering provider, and CPT code respectively, using the SQL query:
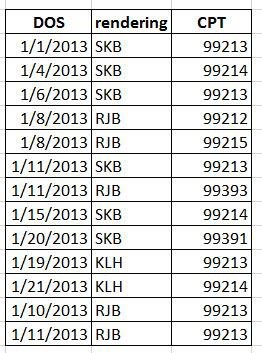
SELECT ARCHIVE_TRANSACTIONS.DATE1, STAFF1.STAFFINIT, ARCHIVE_TRANSACTIONS.CPTCODE,
FROM ARCHIVE_TRANSACTIONS
INNER JOIN STAFF1 ON (ARCHIVE_TRANSACTIONS.REND_ADDR_ID = STAFF1.STAFFID)
WHERE (DATE1 BETWEEN ‘1/1/2013’ and ‘1/31/2013’) AND
(CPTCODE BETWEEN ‘99201’ AND ‘99395’)
ORDER BY STAFF1.STAFFINIT, ARCHIVE_TRANSACTIONS.CPTCODE
(Remember that REND_ADDR_ID gives the user ID number, e.g. 105, rather than the name, e.g. Robert J. Berman, Jr, MD, or the initials, e.g. RJB. In order to show the name or the initials, you’ll need to link to the STAFF1 table. Read more about the STAFF1 table under Staff Member Names and Numbers.)
We’ve seen how we could simply dump the above raw data OP Report to Excel, then use a Pivot Table to group it how we want. But we can also have OP Reports do this for us.
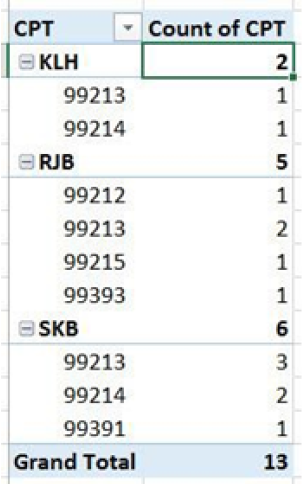
There are several ways we could organize a productivity report: by CPT code, by day of the month, or by provider. Let’s say we want to know: how many E&M CPT codes did each provider produce during the month of January 2013? That is, I want my table to show provider KLH did this many 99212s, 99213s, 99214s, and so on; then I want to see a similar breakdown for the other providers. Subtotals by provider and a grand total for the month would be good, too.
In this case, we are subtotalling provider (STAFFINIT), then sub-sub-totalling by CPT code (CPTCODE).
Groups start with Group0 and are nested, incrementing in numbers. In this case we want Group0 to be STAFFINIT and Group1 (a subgroup of Group0) to be CPT.
So we start by entering an SQL query OP Reports, using the Query Designer tabs, until we get the following query, which will give us E&M codes for the month of January 2013, sorted by rendering provider initials, then by CPT:
SELECT ARCHIVE_TRANSACTIONS.DATE1, STAFF1.STAFFINIT, ARCHIVE_TRANSACTIONS.CPTCODE,
FROM ARCHIVE_TRANSACTIONS
INNER JOIN STAFF1 ON (ARCHIVE_TRANSACTIONS.REND_ADDR_ID = STAFF1.STAFFID)
WHERE (DATE1 BETWEEN ‘1/1/2013’ and ‘1/31/2013’) AND
(CPTCODE BETWEEN ‘99201’ AND ‘99395’)
ORDER BY STAFF1.STAFFINIT, ARCHIVE_TRANSACTIONS.CPTCODE
Then we want to lay out the design of our report, including creating two groups. Each of our two groups will have a Group Header and a Group Footer; these bands, plus the Title, Detail, and Summary bands, bring our total of bands to 7. We want to lay out our bands and their contents in the following schematic:
| Band | Group This Band On | Band Contents |
|
Title |
“CPT Count of CPT” |
|
|
Group Header[0] |
STAFFINIT |
[STAFFINIT] [COUNT(STAFFINIT)] |
|
Group Header[1] |
CPTCODE |
|
|
Detail |
||
|
Group Footer[1] |
CPTCODE |
[CPTCODE] [COUNT(CPTCODE)] |
|
Group Footer[0] |
STAFFINIT |
|
|
Summary |
“Grand Total” [COUNT (CPTCODE)] |
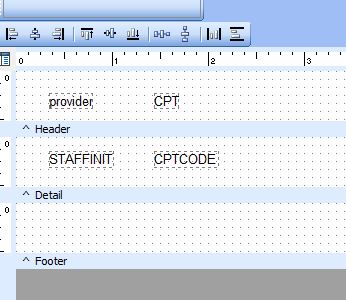
We start by laying out the basic report elements as described in the Quick Start pages above (see “Quickstart: Laying Out a Very Basic Report”) until we have this:
We create the STAFFINIT and CPTCODE groups by going to Report, then Groups, so we have the Groups tool panel visible:
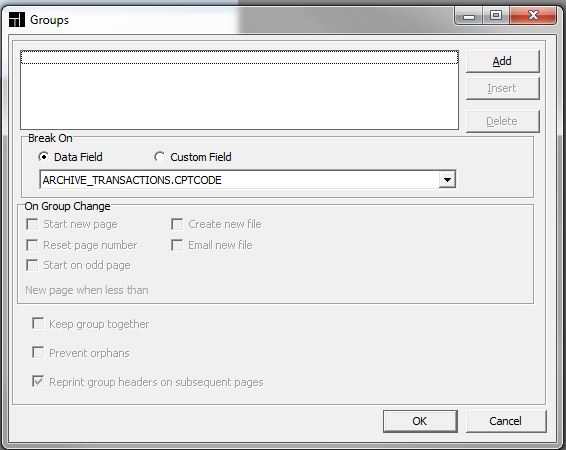
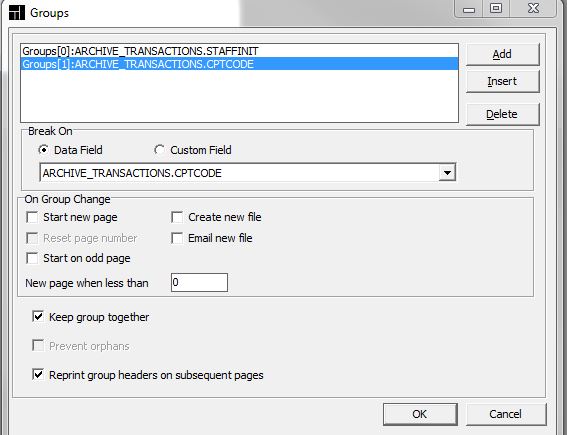
By setting the Break on Data Field dropdown first to STAFFINIT and clicking Add, then CPTCODE and clicking Add, we get our Group0 and Group1 as we need them:
When we click OK and return to the Design tab, we notice new Group bands on our report:
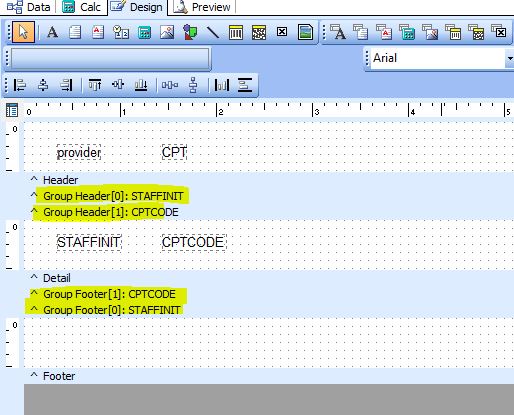
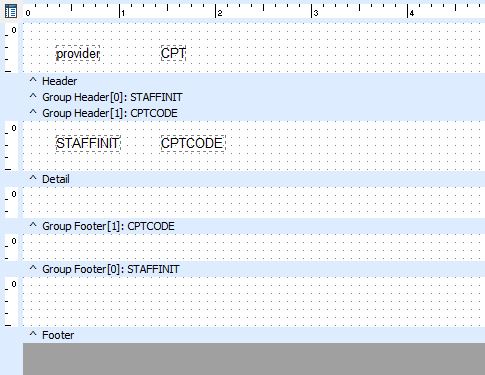
The bands are still collapsed, i.e. there is no visible white grid for them yet. We can “open” the bands by clicking and dragging the grey band downward or upward:
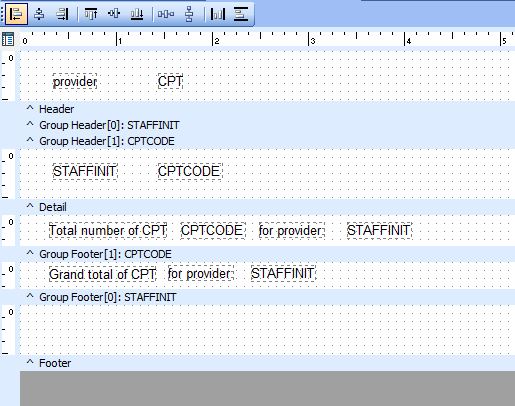
We then add a few orienting Labels and DBTexts to our newly-opened Group Footer bands:
But now we actually need to tell OP Reports to do the counting. We want two simple calculations to count up the number of 99213s, 99214s, etc. each provider did during the period, as well as the totals for each provider. We can use the DBCalc COUNT feature to do this for us. (More to follow on this in SUM and COUNT.)
To get a DBCalc COUNT, click on the DBCalc tool (circled in red) then click the place in the GroupFooter you want the count to appear (yellow highlight):
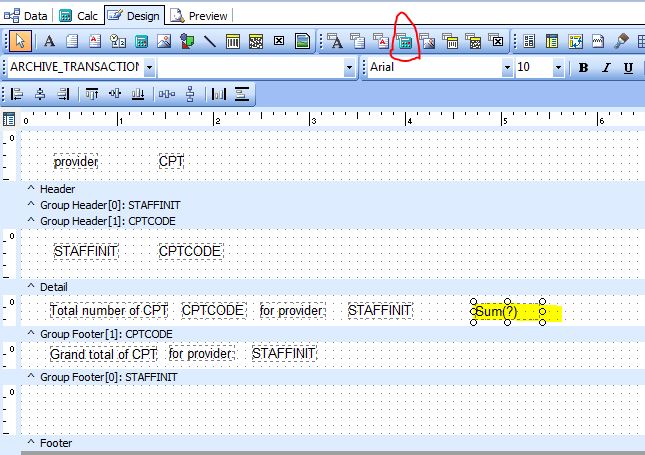
Any new DBCalc element defaults to SUM(?), meaning it wants to SUM, and ? means it doesn’t yet know what it is SUMming (Charges? Adjustments? Number of patients?) We’ll see more about this later (see SUM and COUNT.)
You can set the DBCalc element to COUNT the number of CPTs by right clicking on the newly-placed DBCalc element and choosing Calculations… from the dropdown (red circle), then choosing OK. (In general, do not change the Reset Group dropdown.)
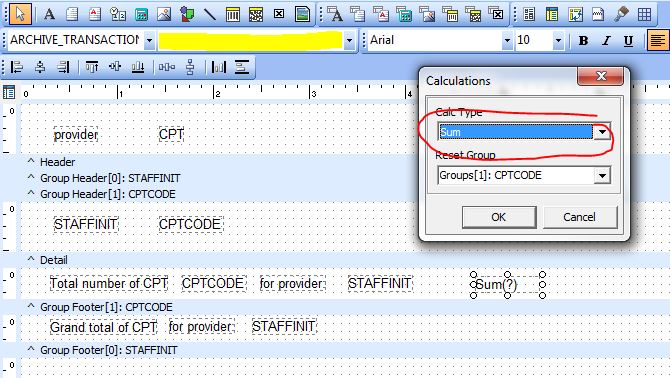
Then set the yellow dropdown to CPTCODE. Your newly placed DBCalc element should now say Count(CPTCODE):
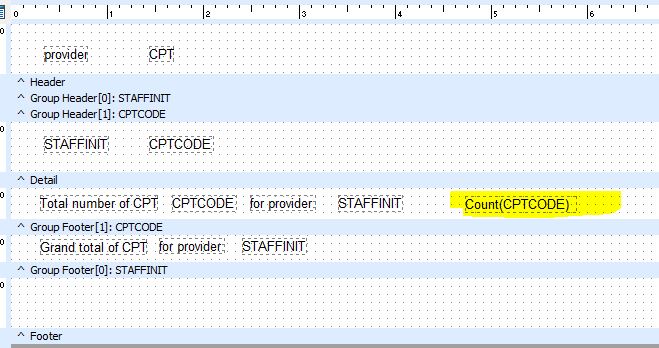
Similarly, create a second Count(CPTCODE) DBCalc element for the GroupFooter[0] band. After setting up all these report elements, the report should look like this:

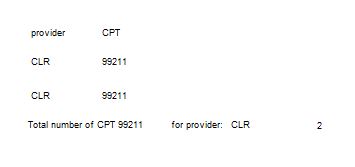
When we run our report, we get pages that look like this:

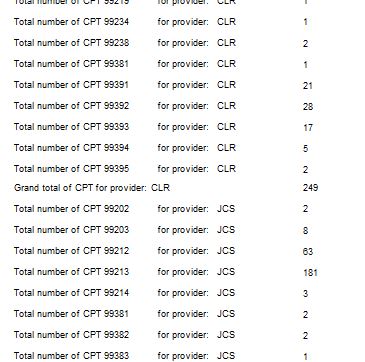
In fact, we get an awful lot of pages throughout the report that look like this:

We can tell from spot-checking that the totals appear correct, and these long lists of provider name/ provider CPT don’t really add anything. We just want the totals, so we can hide the Detail band of the report to show only the Group Footer bands. That’s really the summary data we’re interested in anyway.
We do this by right clicking on the white gridspace of the Detail band and unticking the Visible option. The Detail band still looks the same in the Design tab of our report. But when we click Preview and view the report, the Detail disappears, and we’re left with the summary meat of the report:
To make our report easier to read, we can go back and add horizontal lines, bold face, or different colors in the Design view if desired.
What’s interesting about productivity reports like this is that virtually all of the data we want is grouped or summarized data, rather than any raw or patient-level data. That is, we don’t really care about individual patient numbers, first/last names, or dates of birth. We care more about how many total patients were seen, how many total 99214s were performed, which provider saw the most 99215s, etc. Notice we really didn’t need anything in the Detail band of our report. All the fields were put in our Group Header and Footer bands, and in the Title and Summary bands.
We might want a different kind of monthly productivity report, in which we summarize the raw data in any number of formats. Here are some possible alternative formats we might use:
- How many patients were seen in total each day?
- How many patients were seen by each provider each day?
- How many total E&M of each type were produced during the month?
The raw data resulting from the same SQL query — date, rendering provider, and CPT code — can be regrouped in several different ways to produce all these variations.
|
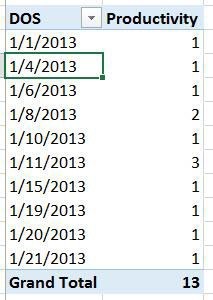
Method A: Group by DOS |
|
 |
||||||||||||||||||||||||
|
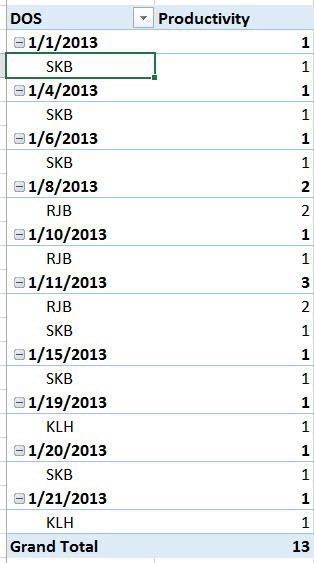
Method B: Group by DOS, Group by Rendering Provider |
|
 |
||||||||||||||||||||||||
|
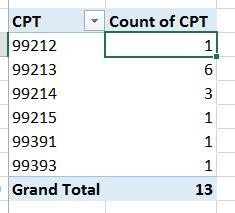
Method C Group by CPT |
|
 |
So the same SQL query can be “re-grouped” for formatting in a variety of different ways. You may find that existing OP Reports that don’t quite meet your needs can be “made over” by re-grouping in a way that’s useful.
If you are particularly astute, you may have noticed that sometimes the Header and Footer bands can be interchangeable. For example, in Methods A and C, there is only one group (DOS and CPT, respectively), and the layouts look very similar. But in Method A, the label [DATE1] and the counting variable appear in the Group Footer, while in Method C, the label [CPTCODE] and the counting variable appear in the Group Header. Because there is nothing in the Detail band, you could put either of these in either the Group Header or Group Footer with the same results. In general, the innermost band being used can use its header or footer for summary data. In this case, Group[1] is the innermost band, since we’re not using the Detail band.
You Need Some Sort with Your Group
When you use Grouping, be sure that you have sorted your data: your SQL should also have a matching ORDER BY command.
Groups “break” when there is any change in the data. In order for them to divide properly, all the like data need to be first grouped together.
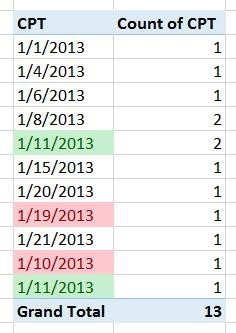
For example, in Method A above, the report will start counting CPT instances under the first row’s date, 1/1/2013. It will stop counting those instances at the point where date 1/1/2013 switches to another date, print that number, and start counting CPT codes again beginning with CPT code 99201 under the next date, 1/4/2013. This looks ugly, disorganized, and random.
Thus, we want to be sure that our data is first sorted by DOS before we try to group it. Otherwise, we get dates which appear out of order and, even worse, multiple partial groups of a DOS instead of a single unified DOS.
|
|
Wrong Way (without first sorting the raw data) |
 |
 |
Right Way (by first sorting the data on DOS) |
 |
If you have multiple nested Groups, be sure that the sorting includes all those groups in the same order. For example, let’s say your Group bands are:
^ Group Header[0]: DATE1
^ Group Header[1]: REND_ADDR_ID
^ Group Header[2]: CPTCODE
^ Detail
^ Group Footer[2]: CPTCODE
^ Group Footer[1]: REND_ADDR_ID
^ Group Footer[0]: DATE1
You would set the sort fields in this order from within the Report Builder:
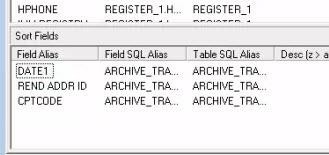
….and the resulting SQL query would include:
ORDER BY ARCHIVE_TRANSACTIONS_1.DATE1, ARCHIVE_TRANSACTIONS_1.REND_ADDR_ID, ARCHIVE_TRANSACTIONS_1.CPTCODE