
Walkthrough Example #2: Mass Creation of Patient Forms
Let OP create a mass of forms automatically for your practice; your staff will no longer have to complete them by hand.
Background and the Need
Every year we try to migrate patients away from a “bad” managed Medicaid plan to the “good” managed Medicaid plan in our state. The “good” MCO pays better and is easier to do business with. Our patients in the “good” network have more specialists and therapists to choose from, with shorter drives and shorter wait times. So the more patients we can channel to the “good” network, the better our practice does financially and the happier our patients are.
(So that we don’t get anyone mad, we’re not going to call the bad insurance company by its real name. We’re going to call it BAD.)
We start flagging our patients with the non-preferred insurance every winter; our front desk explains to them the pros and cons of switching. If the family agrees (as they do 95% of the time when we explain our rationale), we complete a MCO Switch Form for them to sign. On May 1, the start of the open enrollment period, we fax dozens, if not hundreds, of these forms to the Bureau of TennCare (our state’s Medicaid agency).
But it takes a while to fill out these forms. Our front desk is busy. Patients don’t like to wait. What if we created a way to automatically print these forms for all people who need one? If they agree, they can sign, and if they don’t want to switch, our receptionist can just shred the form.
Part One: Importing the Form Image
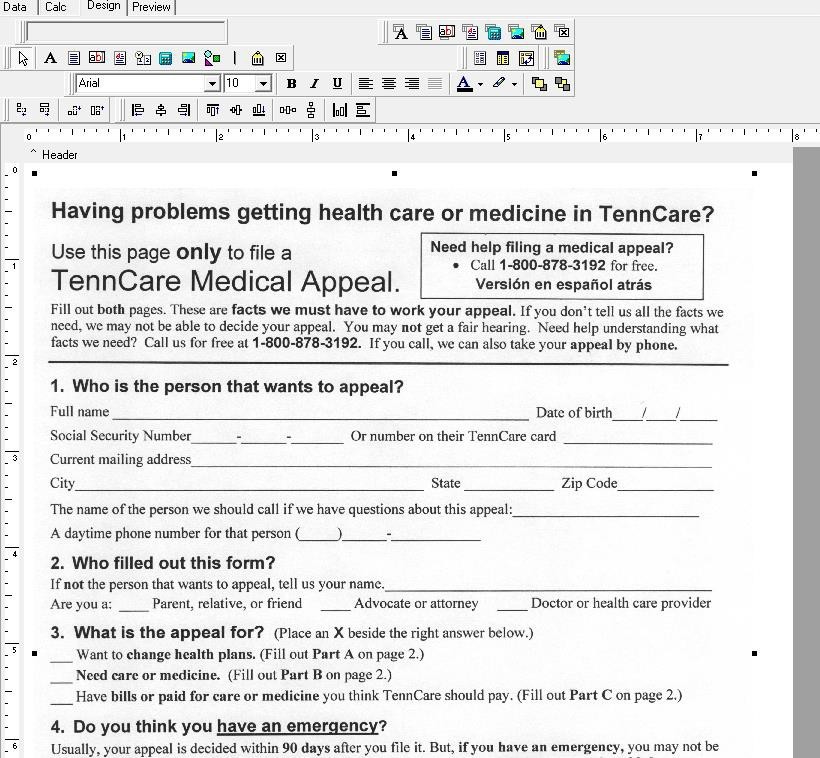
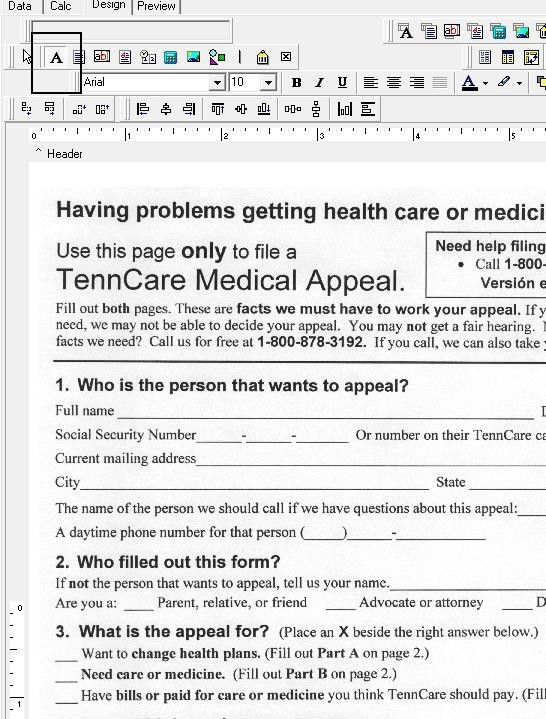
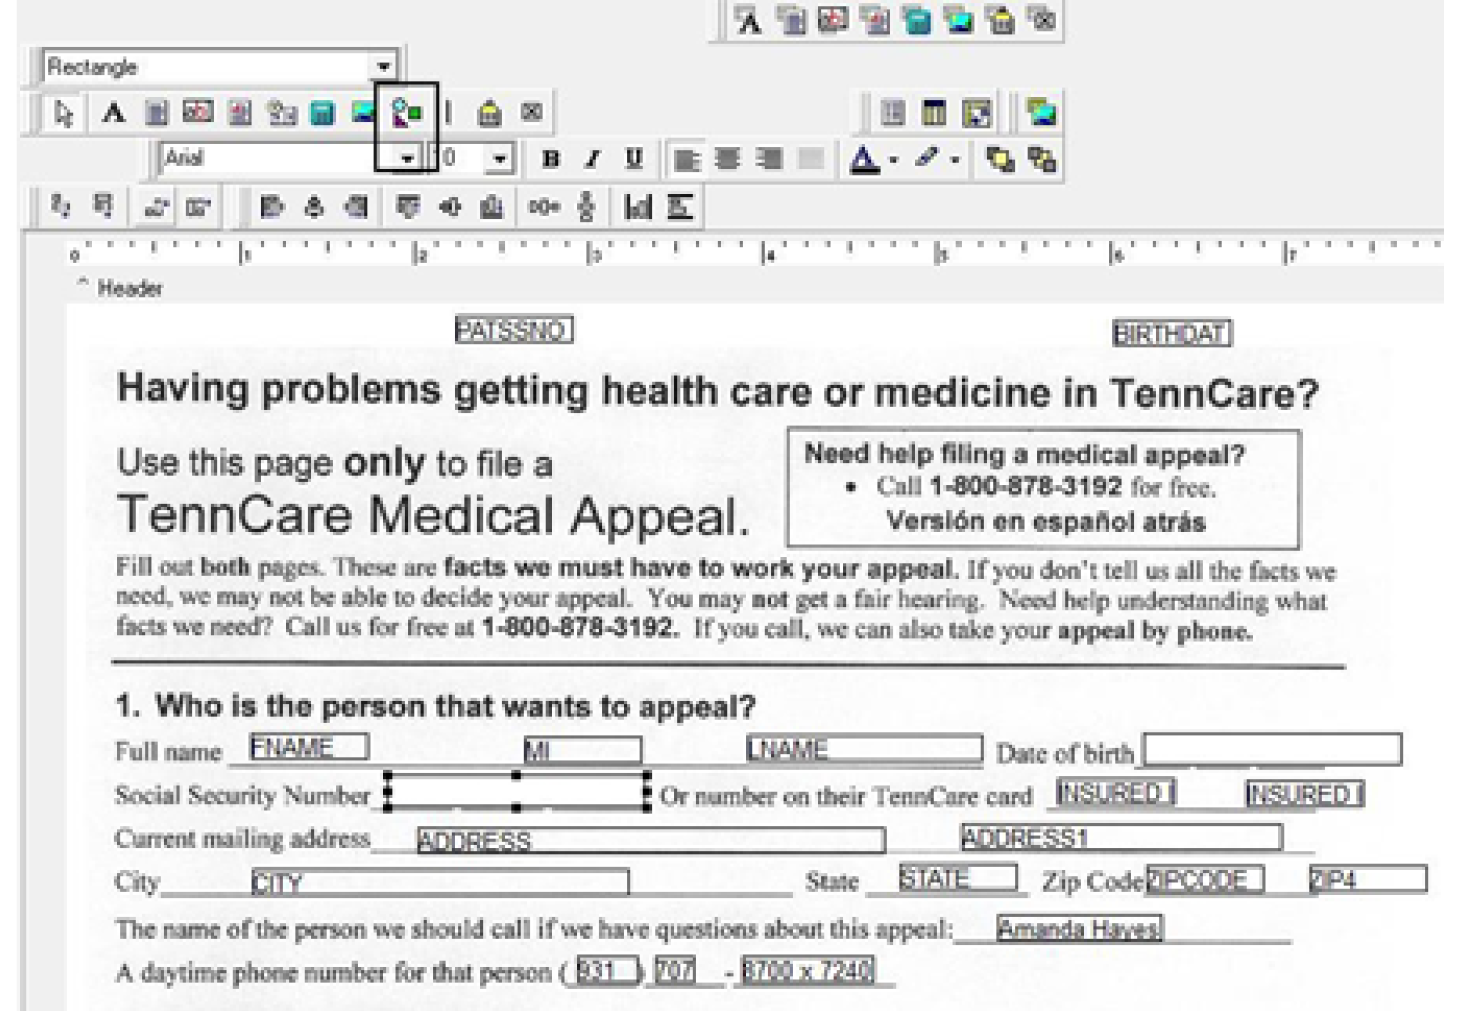
The form we need to use looks like this (at least, this is the first of two pages – the second is not important though):
There’s a lot of stuff there. We can certainly try to recreate the form in our report by hand using the Label tool and the Line tool. But it’s usually faster and cleaner to import a clear JPG image of the blank form, then create the OP report to print “on top of” that image.
Using a scanner or screenshot software, make a JPG of the blank form image. Hint: Saving it in greyscale rather than color will make your image sharper and takes up less memory (so your form will load and print faster.)
In OP Reports, create a new report.
From the Design tab, click the Picture tool:
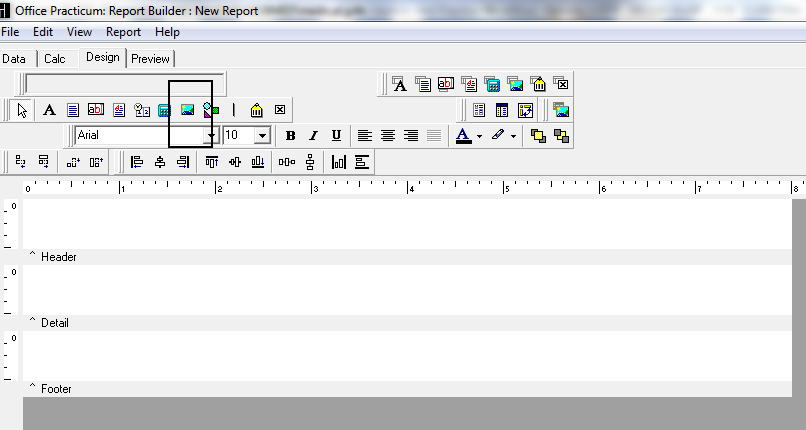
…then click on the Detail band to insert a picture there. To set the properties of the picture, right click on the Image1 icon you just placed in the Detail band. Several options appear.
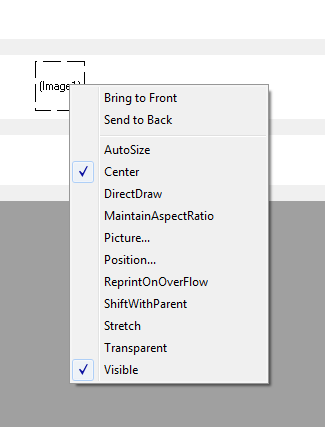
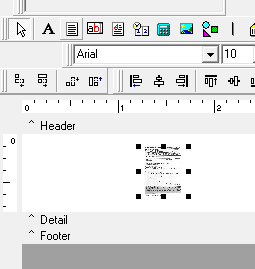
Choose Picture… and select the JPG of the form image. A tiny portion of the form appears in the square:
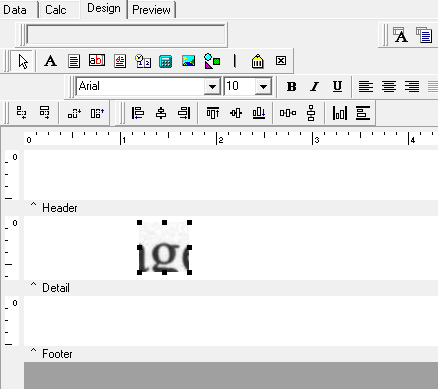
Now that the correct picture image is loaded, we want expand it to fill the entire page, preserving the proportions of the image (so it doesn’t look smushed.) Right-click on the Image1 icon, and check Maintain Aspect Ratio and Stretch. Now we have a teeny-tiny, but proportional, form in the corner of our page:
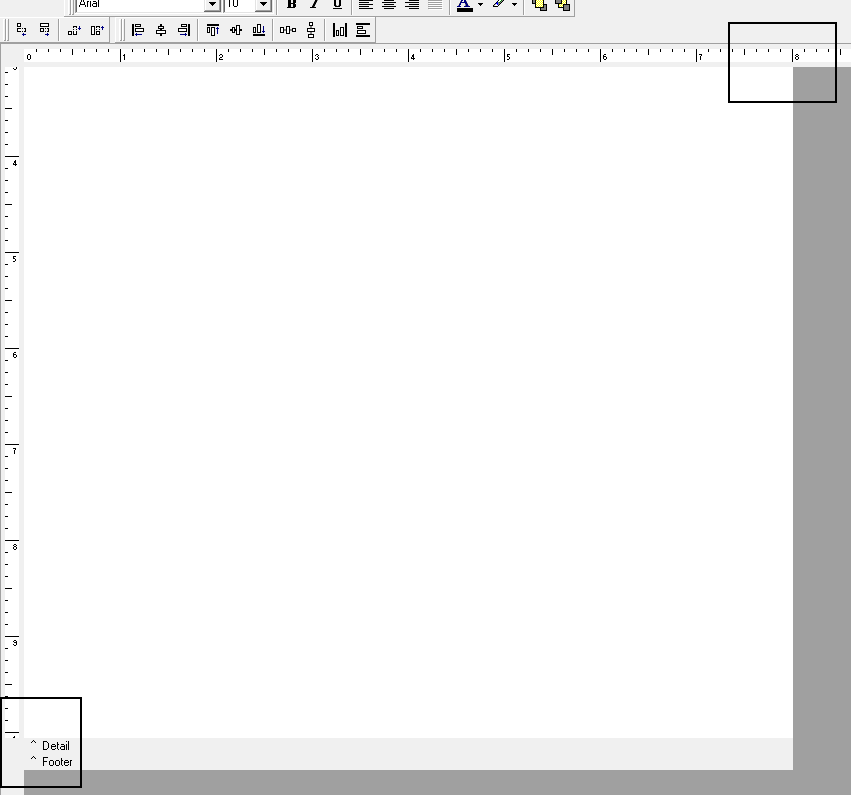
Now we want to expand our image to fill (or mostly fill) an 8.5 x 11” sheet of paper.
We start by shrinking the Header and Footer to 0 inch heights, by dragging them closed:
Then we make the Detail area of the form large enough to house a picture that will be, say, 7.5 x 10” (to allow adequate print margin) – again by dragging down the bottom of the Detail band until the measure on the left reads 10 inches. The left-right measurement is fine already:
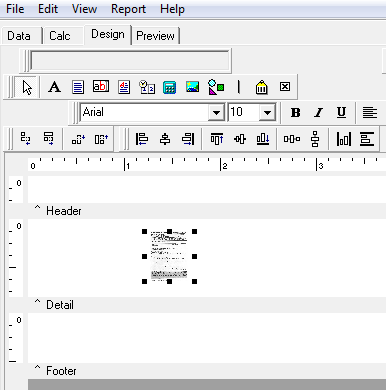
Now we want to expand our tiny picture to fill the canvas. You can drag and resize the picture.
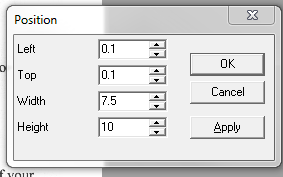
Or right clicking on the picture and choosing Position, you can set the numbers precisely:
At this point, do a quick “reality check” of the form to make sure it behaves as expected when you print it out.
Click on the Preview tab, to be sure it doesn’t go to more than one page. If so, you’ll need to resize the image smaller so that it fits on an 8.5 x 11” page:

…because depending on your printer settings, sometimes it will try to print a one page form on 2 pages. But this looks good so far.
Now print out the Previewed form by going to File… Print. Does the resolution look OK? Will it be acceptable to whoever is going to get it (especially if it is faxed or copied again before being sent?)
Save your work.
Part Two: Creating the Rough Report
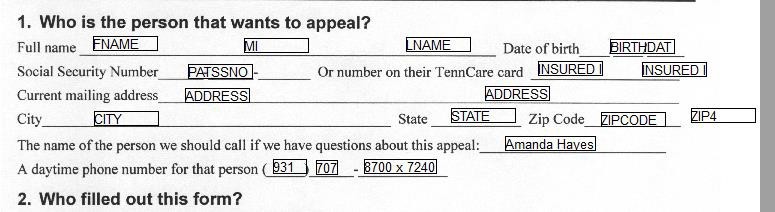
Now we are ready to add the data to the forms. Let’s see what we need, using the Data Dictionary to find out where these fields are stored:
- Full name: the REGISTER.FNAME plus the REGISTER.MI plus the REGISTER.LNAME
- Date of birth: the REGISTER.BIRTHDAT
- Social Security Number: the REGISTER.PATSSNO
- Number on their TennCare card: the REGISTER.INSURED_ID or the REGISTER.INSURED_ID_OTHER, depending on whether BAD is their primary/only insurance or their secondary plan.
- Current mailing address: the REGISTER.ADDRESS plus the REGISTER.ADDRESS1
- City: the REGISTER.CITY
- State: the REGISTER.STATE
- Zip Code: the REGISTER.ZIPCODE plus the REGISTER.ZIP4
- The name of the person we should call if we have questions about this appeal: Amanda Hayes, our billing department head
- A daytime phone number for that person: (931) 707-8700 x7240
- Who filled out this form? The parent or guardian who presents with the child. We’ll leave this blank so they can fill in their name at the time they sign it.
- Are you a: This will always be the first selection, “Parent/relative/friend.”
- What is the appeal for? We will always want an X beside “Want to change health plans.” This will be a fairly straightforward report, since all the information we want is in the REGISTER table. So we’ll get these fields using the Query Designer:
In the Data tab of OP Reports, select New, then choose Query Designer.
Double-click on the REGISTER table in the list of tables, to add it to the Selected Tables group at the bottom:
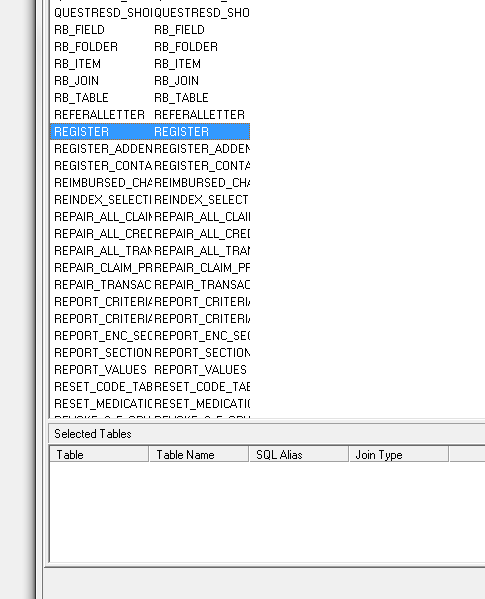
Since there is only one table we are using, we don’t have to do any table joins on this tab.
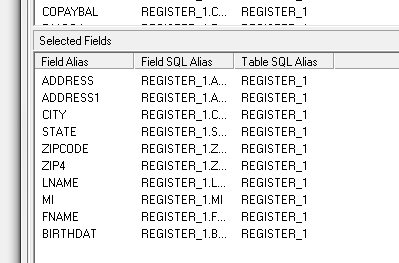
In the the Fields tab of the Query Designer, double-click on all the fields we’ll want to see on the report:
Now we go to the the Search tab of the Query Designer to set our search parameters.
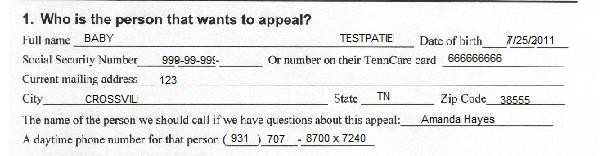
For Search, we certainly don’t want to print forms for ALL registered patients – eek. In fact, during the testing phase, we should probably just test it with one patient who we know to have BAD insurance. Or maybe just two patients – one with primary BAD and one with secondary BAD. A quick check of OP shows we can use patients #4797 (Baby Testpatient) and #103 (Steven Testpatient) for this purpose. So we will add them to the search parameters:

Part Three: Laying Out the Form
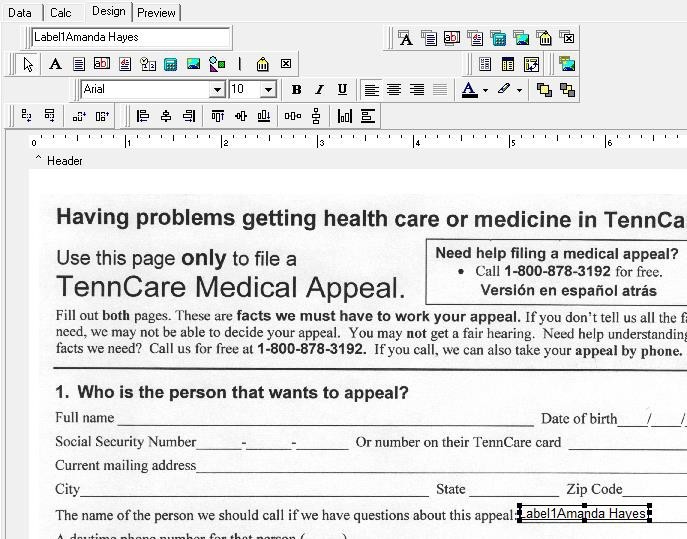
Let’s start with the slam-dunk-easy stuff: filling out the static fields that aren’t going to change from patient to patient. We use the Label tool for this:
We plunk the labels on the lines we want to fill in. The box in the upper left hand corner is what we edit to get the label how we want it.
You can also change the font type from Arial to a different font, or the font size to bigger/smaller to fit the form, and/or use bold, italic, or underline typeface using the tools in the middle row. For example, I want my X’s to stand out, so I will use 14 point bold font for those.
Now our static fields are finished. We can click on the Preview tab to see what it looks like:
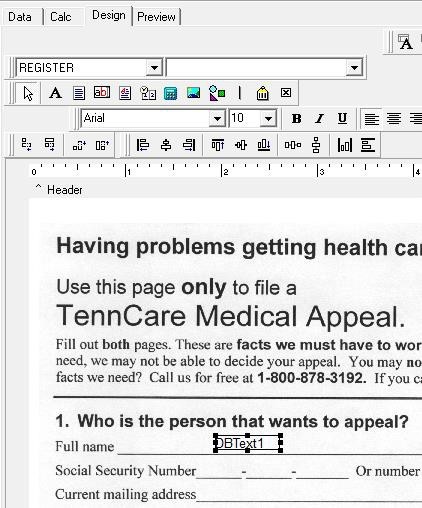
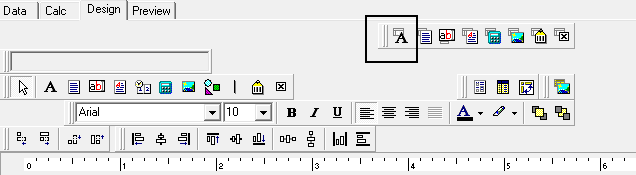
Now we add the patient-specific fields using the DBText tool (a small box with a letter A next to it.)
Click the the DBText tool, then click the place on the form where you want the field to appear. You will see that a small box called the DBText 1 appears:
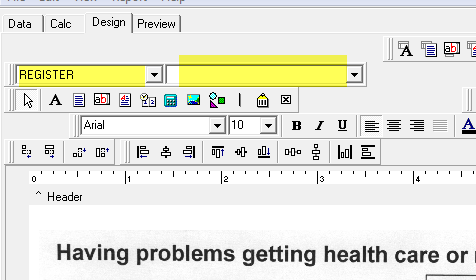
Now we want to link this to the first data piece: first name. When DBText1 is highlighted (we can tell it is, above, because there are nine dark squares at each edge and corner of the box) we see what data field it’s linked to in the dropdown boxes above the toolbars. We see that it’s linked to the REGISTER table, but the field table is blank, i.e. it’s not linked to anything yet:
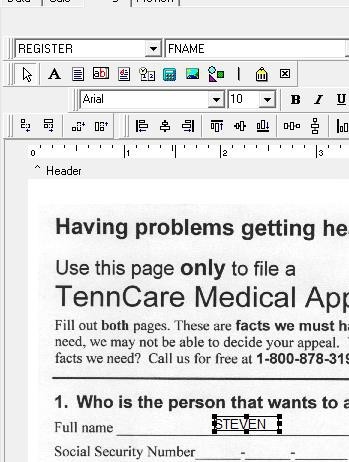
We can set the blank drop down to FNAME, and voila, the text changes to show the first name of one of the patients we’ve selected as a test, STEVEN TESTPATIENT, #103:
Now in a similar manner we proceed and add DBText components for each data piece we want to add, linking them through the dropdowns:
So it’s not very elegant, perhaps, and we could use some help with fixing the spacing and making things line up nicer, but when we go back to the Preview, we see that each of our test patients have a legible form:
Part Four: Cleaning Up the Form
We want to expand data fields to allow that some fields, like last name, city, address, etc. get truncated by a field that’s not wide enough. We do this by selecting the data row we want to stretch, mousing over until we see a double left/right arrow, then dragging the right side of the data field further to the right.
We want the FNAME, MI, LNAME to appear as a single unified field, not a field with a bunch of spaces in between the 3 elements. Use the Variable tool to put a variable on the Full name line. Right click to add programming for the variable. In the Calculations field, enter the following text:
Value := REGISTER[‘FNAME’] + ‘ ‘ + REGISTER[‘MI’]
‘ ‘ + REGISTER[‘LNAME’];
Remove/delete the FNAME, MI, and LNAME fields.
We want the ADDRESS and ADDRESS1 fields to also appear as a single unified field. We can do this the same way.
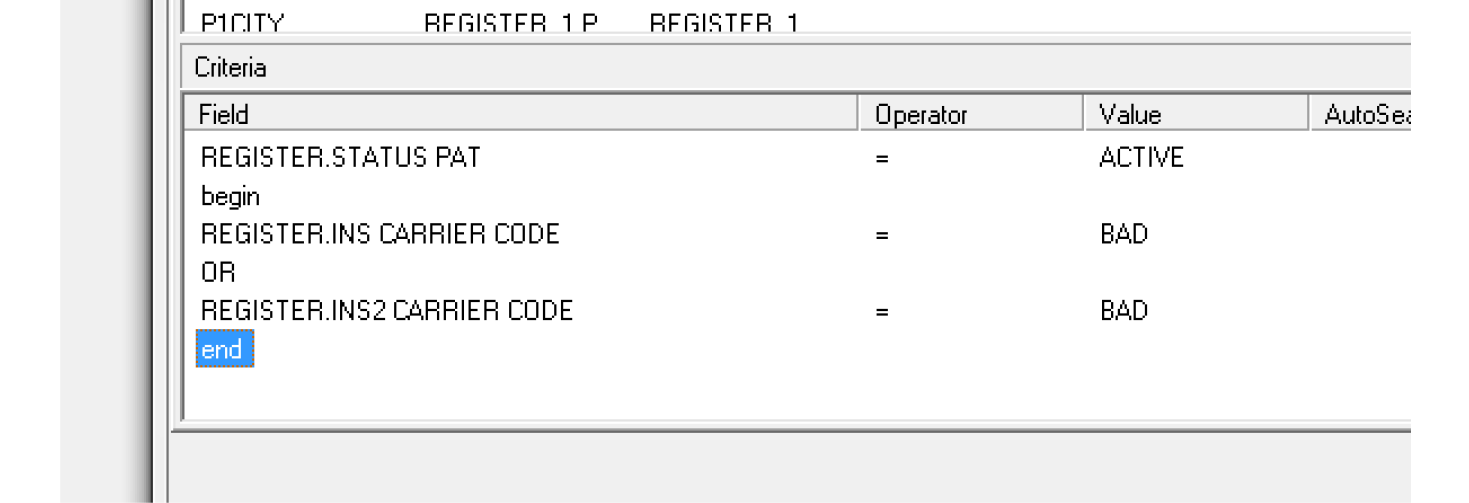
We only want to show the insurance number of the BAD TennCare MCO plan, not both insurance numbers. That is, we want to suppress Steven’s primary insurance ID, 484562763, and show only his BAD insurance ID, 696969696.
Use the Variable tool to put a variable on the “TennCare card line.” Right click to add programming for the variable. In the Calculations field, enter the following text:
if REGISTER[‘INS CARRIER CODE’] = ‘BAD’ then
Value := REGISTER[‘INSURED ID’];
if REGISTER[‘INS2 CARRIER CODE’] = ‘BAD’ then
Value := REGISTER[‘INSURED ID OTHER’];
Remove/delete the INSURED ID and the INSURED ID OTHER fields.
We want to align Amanda’s phone number. We can choose the three elements (area code, prefix, number) by dragging the Select Object tool. Unfortunately, with a large graphic in the background, that graphic gets in the way of wanting to be selected. So we can select these three items by selecting one, then holding down the Shift key while clicking the other two. Then click the Align Bottom tool.
We also want to align Zipcode and Zip4.
We want to clean up the date of birth and SSN fields because our data has dashes or slashes in it, and there are dashes/slashes on the form already. This is not a huge deal, but it looks messy:
![]()
![]()
We have multiple options here:
- Segregate each sub-part of the data field into its own variable, then place them between the slashes/dashes already on the paper. This is time-consuming and way too much overkill for a Medicaid form, so I won’t go into that here (but be assured that yes, it is possible.)
- Experiment with the width of the data field, the font size, and its alignment to where the numbers perfectly line up with the pre-existing slashes or dashes. A little easier, but still way too time-consuming since an “11” is going to be a lot skinnier than an “08” in many fonts.
- Cover up, with “digital whiteout,” the dashes/slashes already on the page, so only the OP data field’s dashes/slashes appear. This is quick and has the best appearance.
- Start by moving the BIRTHDAT and PATSSNO fields out of the way temporarily. Dragging them to the top of the form is fine.
- Then click on the Shape tool and click on the area you want to add “digital whiteout.” Drag the corners of the white box in such a way as to cover up the dashes and slashes of the DOB and SSN fields:
Then move the PATSSNO and BIRTHDAT data elements down to their respective spaces, and click Preview to see what it looks like now. You may have to right-click some combination of the background form image, the small white boxes, and/or the data elements and set them as “Bring to Front” or “Send to Back” to get the image on the bottom, the box in the middle, and the data elements on top:

And that looks cleaner.
Now our form is nearly finished.
Part Five: Rolling Out Your Form
Now you need to decide how you want to implement use of this form. Right now the report is only set to print your two testpatients, but you want to be able to print the form for anyone for whom it might apply.
What we do next depends largely on your office workflow and also the scope of your project. Do you have only 7 patients with BAD insurance across only 3 families? Do you have 1000 BAD patients?
- Possibility A: Do you want to print out one form for each active patient with BAD insurance in your entire practice, keep them in a master folder as patients come in, then complete/fax or shred them as appropriate?
- Possibility B: Do you want to print out one form for each patient with BAD insurance who has an appointment to come to the office today?
- Possibility C: Do you want to print out one form for each patient that has a note of **MCO SWITCH FORM NEEDED** in the Miscellaneous Notes or Billing Notes portion of their F2 Register screen?
- Possibility D: Or do you want to do some combination of these?
Depending on which approach you use, we will edit the Search tab of the OP report accordingly.
Approach A
This is the simplest, most straightforward approach, in that you only have to run the report once and dump everything to the printer. You would want to search for all active patients whose primary or secondary insurance is BAD:
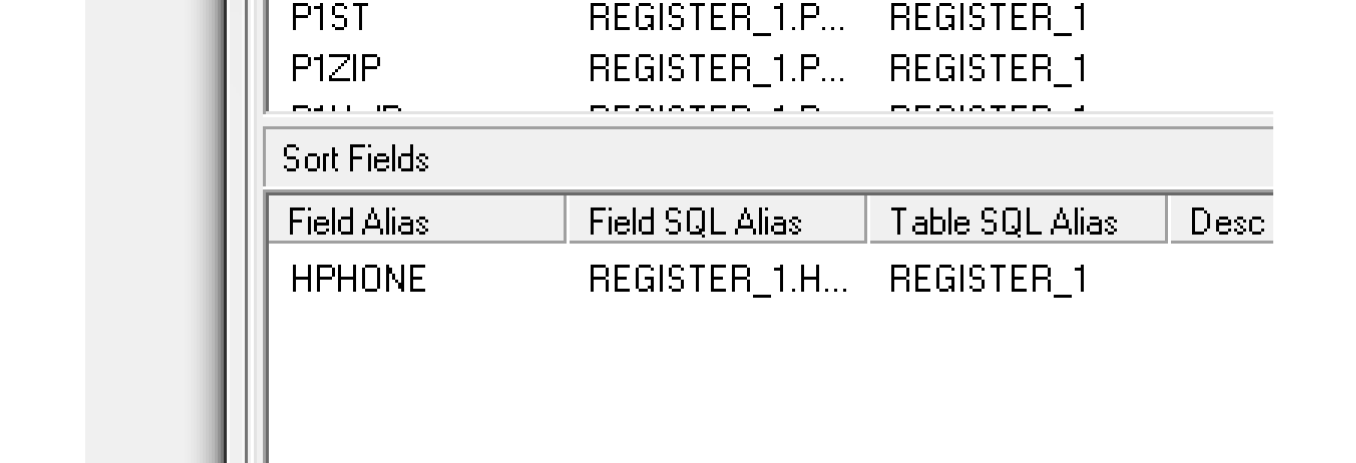
You could also sort this very large list by the patient’s home phone number, so that all family groups with BAD insurance will print together in the stack. That way when Mrs. Jones comes in for John’s appointment, you can have Mary Jones’ and Tracy Jones’ forms clipped to John’s in the master stack, and complete three forms in one visit:
Approach B
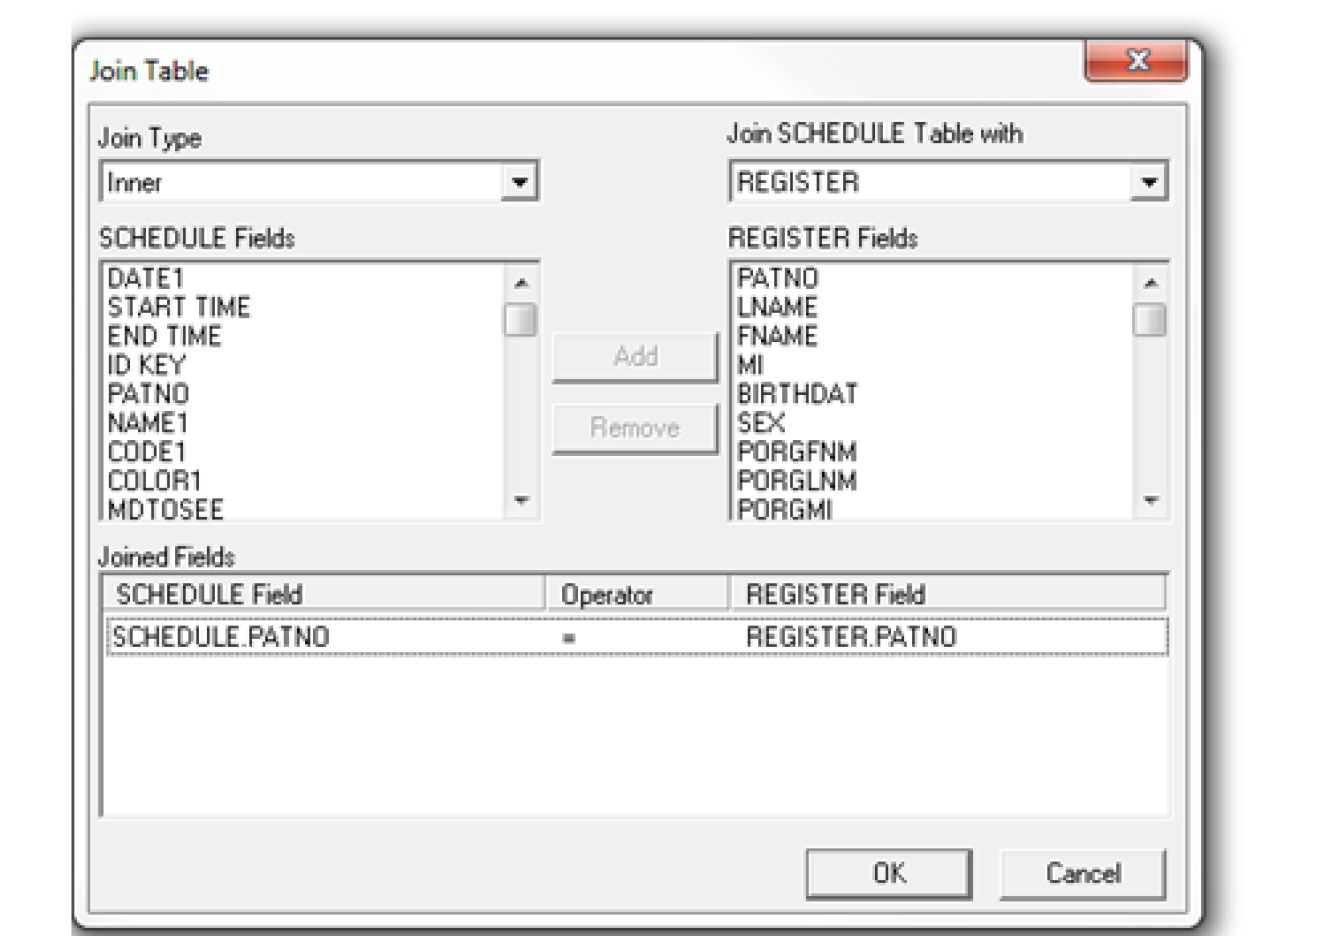
This requires linking your report to the SCHEDULE table to see who is coming in today (or perhaps tomorrow or Monday) with BAD insurance.
Returning to the Query Designer, in the Tables tab, double-click SCHEDULE, then link SCHEDULE.PATNO and REGISTER.PATNO
Now you want to add to the Search parameters an appointment date of your choosing. For best results, when working with the Schedule table, it’s best to use a date range with the Between operator (even though you may only want April 19 and set your search parameters “between 4/19/2014 and 4/19/2014.”) Add SCHEDULE.DATE1 to the search criteria, set the operator to Between, leave the value blank, and click AutoSearch to prompt the report user to enter the data parameters:
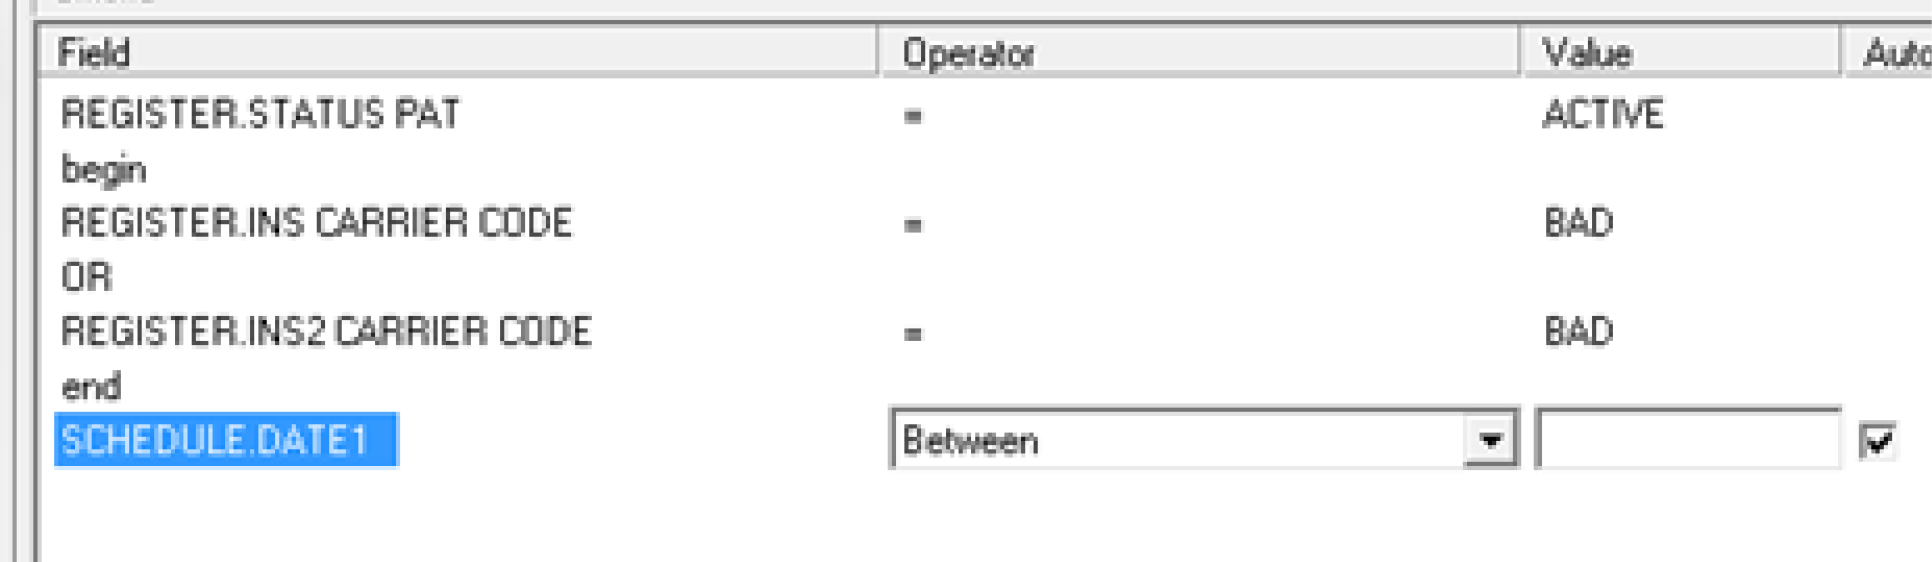
You could take out the STATUS = ACTIVE requirement, since presumably patients who are coming in tomorrow are active status already.
Approach C
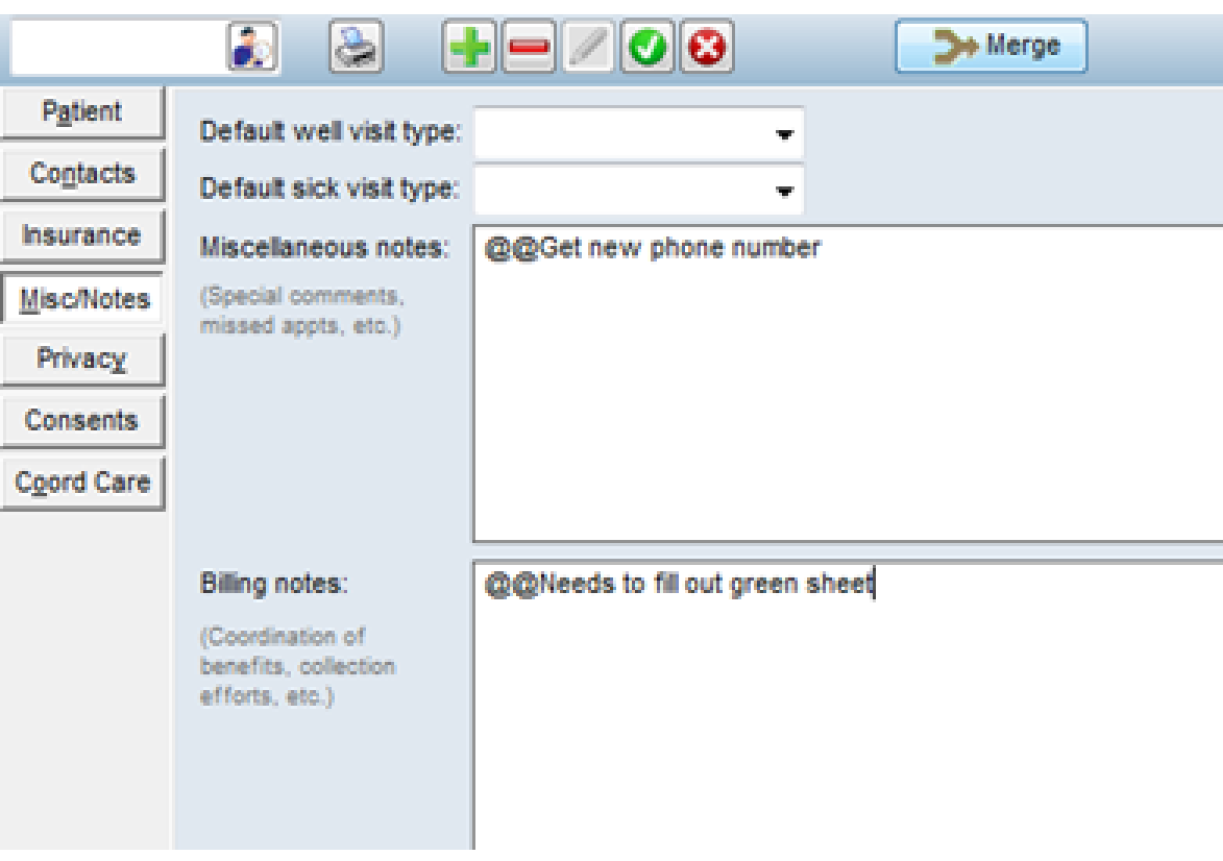
Sometimes practices make popup notes or use other brief, codified notes in the Notes fields of the chart to remind themselves to do something:
If you want to track the status of multiple practice-wide projects, but don’t want the notes to appear in popups every time (to avoid popup fatigue), you can use other short codes (like Twitter hashtags). You can use OP to create reports based on which patients have these notations in their charts.
For example, our practice has generated reports looking for “hashtags” like:
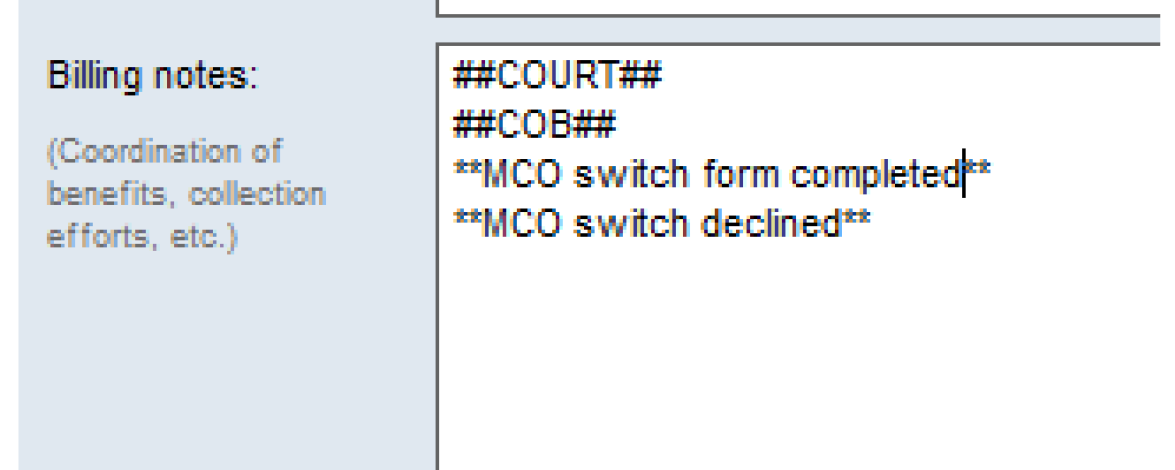
- ##COURT## to find all patients who have a pending court collections action;
- ##COB## to find all patients who have claims denied for COB issues, as part of a weekly followup;
- **MCO switch form completed** to find all patients who already completed an MCO form so the receptionist doesn’t fill out a form 3x for one kid;
- **MCO switch declined** so that we don’t keep harassing a family who wants to keep their BAD insurance.
Let’s say for this approach we want to find patients with BAD insurance who have neither **MCO switch form completed** nor **MCO switch declined** present in their Billing Notes field.
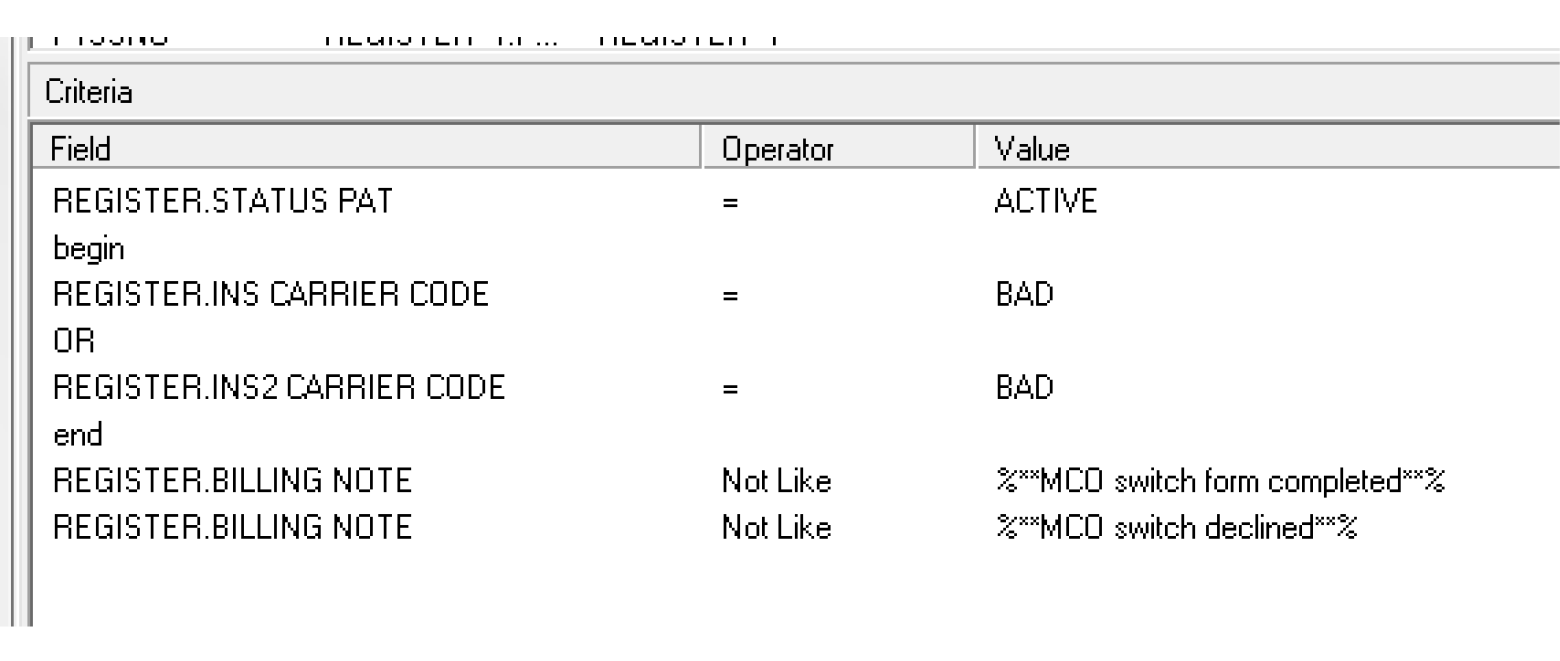
The text you are looking for in this kind of text search should be encased with a percent sign (%) on either end. This allows the text to appear in the front, middle, or end of the text field, with or without other text.
You want to use Not Like rather than Not Equal To because Not Like allows other text to be present in Billing Notes. Think of Not Like as “not containing.” By contrast, Not Equal To is, just like it sounds, Not Exactly-Precisely-The-Same-As.
A word of warning. Hashtags/keywords must be used PRECISELY or the report will not behave as expected. Examples of erroneous hashtags might be:
- **MCO form completed**
- **MCO switched**
- **Mom doesn’t want to change**
- MCO switch form completed (without the leading and trailing asterisks).
In a case like this, you might just want to search for REGISTER.BILLING_NOTE Not Like %MCO%
Which would properly exclude all these examples…
- **MCO switch form completed**
- **MCO switch declined**
- **MCO form completed**
- MCO switched**
- MCO switch form completed
But would also improperly exclude instances in which the letters mco appear together for a reason completely unrelated to your project, like:
- Need to call MCO about denied claims for 11/13.
- @@Don’t let mom bring camcorder into exam rooms.
Approach D
While a combination approach is usually the most effective and elegant, it might require programming beyond the scope of this lesson. Online SQL resources may help you construct more complex queries.