
Follow these steps for each computer on which you plan to install the Immunization Webdriver.
Preparing your computer
- Download the current version of the Immunization Webdriver install package. We will email you a download link.
- Download the current version of Chrome. If you don’t have it already, go to https://www.google.com/chrome/browser/. You will also want to make sure you have the most current version of Chrome.
- Create a folder on your computer for your Immunization Webdriver files, such as C:/NCIR_files. This will be referred to as your “Webdriver data folder.” Your immunization data files will be stored here.
- Copy your practice’s two configuration files (the staff.xlsx file and the practice.xlsx file) to your Webdriver data folder. These are two custom files we create for your practice which contain names of your staff and the location(s) of your practice. We’ll create these two files and send them to you.
- Copy a sample immunization input file into your Webdriver data folder.
- Install the Immunization Webdriver package. Double-click on the icon and follow the prompts. In virtually every instance you can use the default settings. The Webdriver will be installed in its own folder in your Windows’ Program Files directory, which will be something like C:/Program Files (x86)/NCIRWebdriver. Note that this is different from your Webdriver data folder, which contains your immunization data files.
- Double-click the NCIR Webdriver icon. You will see a small blank black-and-white console screen for about 10-20 seconds while the Webdriver initializes. Then you will see the main Immunization Webdriver screen appear:

Initial configuration of the Immunization Webdriver
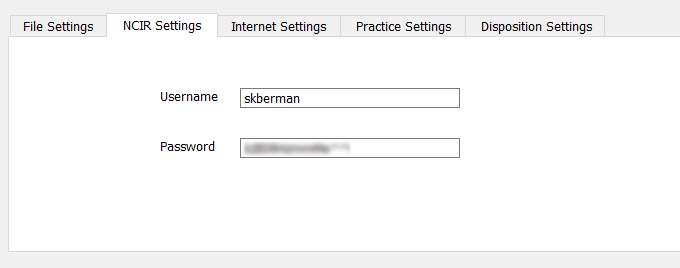
You will need to set default options for your practice the first time you run the Webdriver. In the NCIR Settings tab, enter the “typical user” NCIR account you want the Webdriver to use. Enter the password for this account in the Password slot. Again, be sure this account has typical user credentials for all sites in your practice.
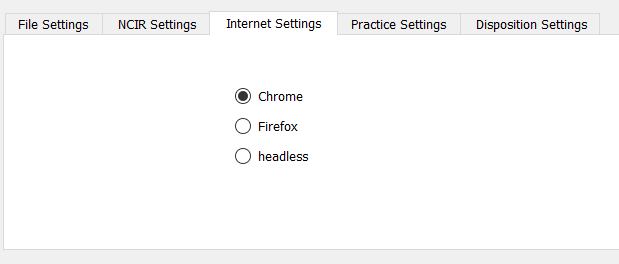
In the Internet Settings tab, be sure the Chrome radio button is checked. (Other browser modes are not currently supported.)
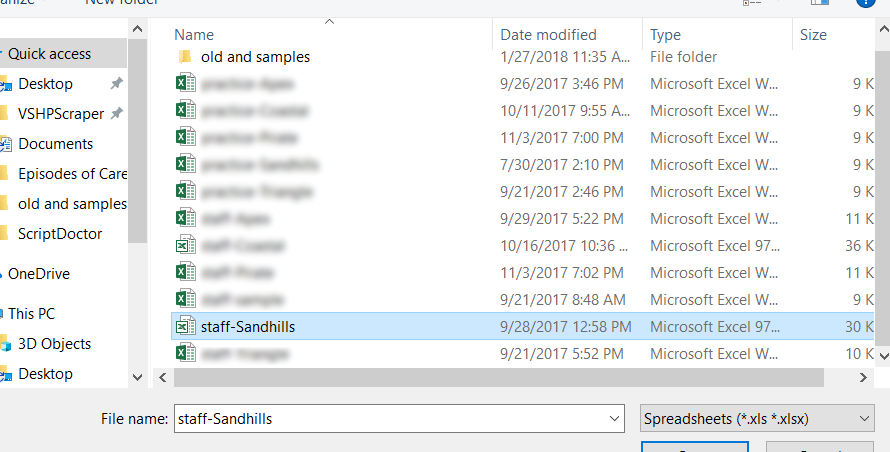
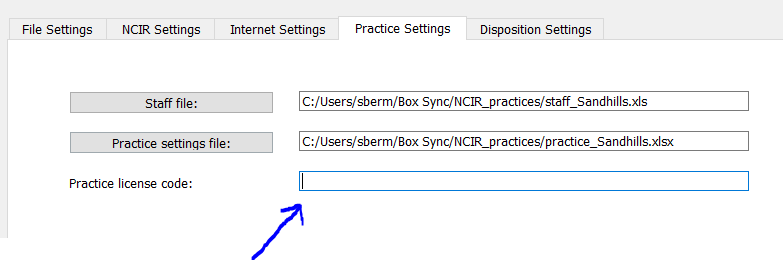
In the Practice Settings tab, click the Staff file: button and navigate to the staff.xlsx file in your Webdriver folder. Select it and click OK.
Similarly, click the Practice settings file button, locate your practice.xlsx file, choose it, and click OK. Now the paths to both the Staff and Practice files should be present.
In the Practice license code field, enter the code you were given during the setup process.
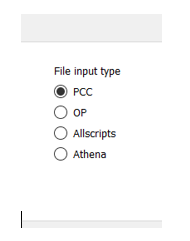
Also, be sure you have chosen the correct file input type for your EMR:
Creating an Immunization Input File
The process for creating an immunization file for upload to NCIR depends on which EMR you are using. Here are the steps to create an immunization input file:
In PCC:
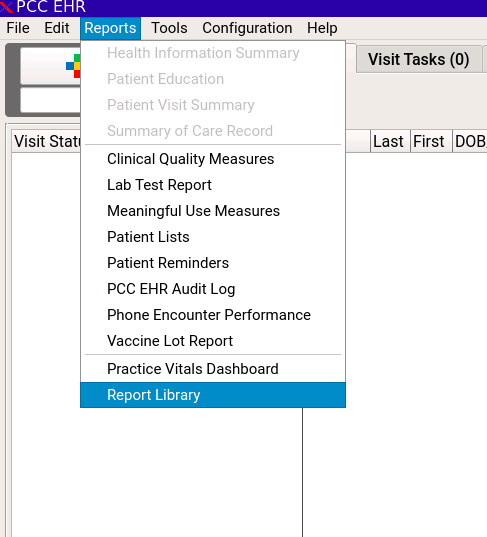
Run the Immunizations Administered report. From the menu bar of PCC EHR, select “Reports,” then “Report Library.”
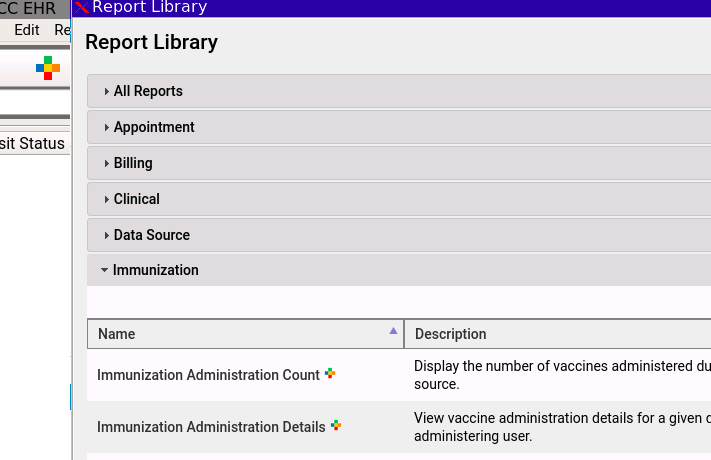
Then select “Immunization Administered Details.”
Select a date range, then click Generate.
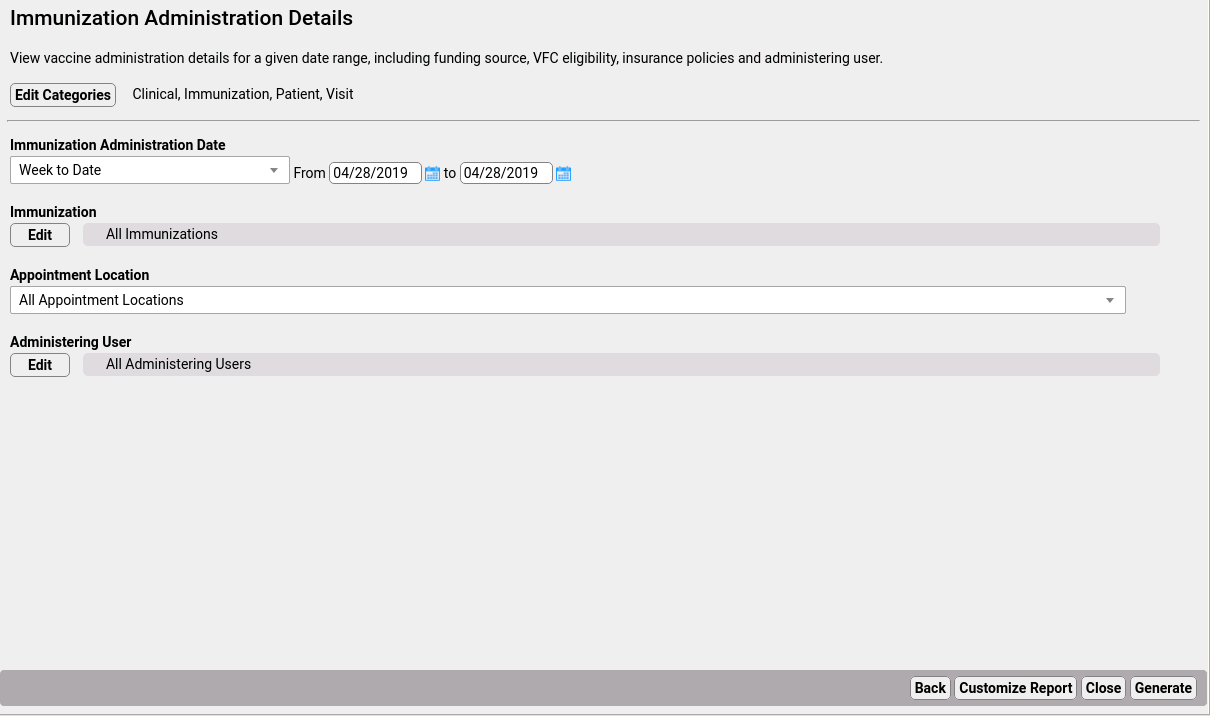
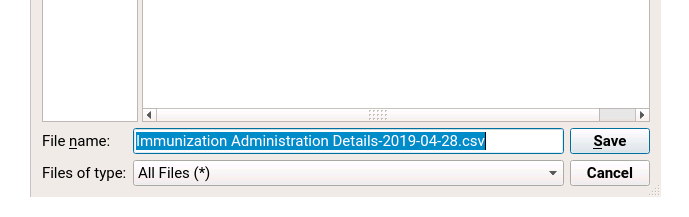
Then save the file as a CSV.

In OP:
In the Database Viewer, save, run, and export the following SQL. At run time, you will be prompted for start and end dates:
select patno, fname, lname, birthdat,bodysite, admin_route, vacname, vacdate, vaclotno, vfc1, cvxcode, staffinit, ‘administered’ as entrytype, location.loc_name as location, s2.staffinit as orderedby from vaccine1
inner join register on register.patno = vaccine1.patno
inner join staff1 on staff1.staffid = vaccine1.s_addr_id
inner join staff1 s2 on s2.staffid = vaccine1.addr_id
inner join vac_inventory on vac_inventory.uniqkey = VAC_LOT_ID
inner join location on vac_inventory.loc_id = location.idwhere vaccine1.date1 >= :startdate and vaccine1.date1 <= :enddate
and vfc1 <> 9
order by location, patno, vacdate
If you are not familiar with using clip-and-save SQLs in the Database Viewer, you can read more on the OP Help Site.
Other EMRs:
Any EMR that can create a report with the following parameters can run the Immunization Webdriver:
- Patient chart number
- Patient first, middle, and last name
- Patient date of birth
- VFC status
- Vaccine name and/or CVX code
- Vaccine lot number
- Vaccine route and site
- Vaccine administrator (nurse) name
If the report also gives insurance information, the Immunization Webdriver can run a checking algorithm on insurance information vs. VFC status.